Hope you having an awesome start to your weekend!
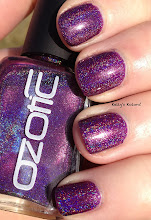
I have a little review to show you today. Incoco kindly sent me a few of their nail polish strips to try out. They arrived the day before halloween, which was exciting because i had actually picked a halloween design in the hope they'd turn up before then :-D
They arrived just in time, because i wore these from Wednesday night, through halloween and up until last night. They held up very well, but unfortunately i have a wedding to attend today, so they had to come off last night. :-( *has a sad* - because these were freakin' adorable!
Onto the pics!!


They come with instructions on the back, and also on a leaflet in the packet.
These work a little different to you typical nail strips. These are used with real nail polish and are more flexible.Incoco strips are made of three layers. A base coat, colour/design coat, and a top coat. You do not need to apply a base coat or top coat to these at all.
I picked out which one was the best fit for my nail and got them ready like so. You actually take the clear cover off before you tear them off the tabs that holds them all together.
*Incoco suggests to peel the backing paper off also before tearing them off the tabs, but i

Also, unlike other nail strips i have tried, these have two sizes on each end, which was good, as i was in-between sizes on some. That also means, they will fit anyones nails.
Before you get started, lightly buff the tops of your nails to smooth out any ridges.
Then, after choosing the one that fits my pinky nail best, i took off the white backing paper and carefully placed the nail strip in place, starting from the cuticle. Line it up so it covers from side wall to side wall.
You have to be really careful with these, as they are very delicate. As you apply them, stretch them a little as you go so they adhere properly, and you don't end up with creases or wrinkles at the free edge.
I found that i ripped the first one i did when i was trying to reposition it, so be really careful!

Once it is in place and you are happy with it, give it a small stretch again at the free edge and pull down. Because these are so delicate, they are easy to tear off at the end if you choose, but otherwise use your nail file and lightly file the excess off in a downward motion.

It should end up like this.

Once your happy with that, smooth it all down again, to make sure you haven't missed any bits that might be sticking up i.e. cuticle area!
Repeat on all nails!
(mind my middle finger, i had a break, and did an acrylic overlay to save it)

And your all done! As mentioned before, you don't need a top coat, as these already come with a topcoat in the layers.
I did these at night, so excuse the pics, but here are some sun pictures i took the next day.


And then in the dark!! These are amazing! The most glow-y ever! lol

This one was taken last night right after i finished them, my lamp was still on, on my desk!

Last one is how glow-y they are after being in the sun for no more than 30 seconds!!! Can't believe how fast they charge up. I couldn't stop going into dark areas of the house just to have a look at them lol

You can buy Incoco from their website. They have lots of different designs from nail colour, nail designs, french manicure designs to pedi designs and colours. The prices range from $7.99 to $9.99 which is a great price as these last for up to 2 weeks!
Products in this post provided for review
Kel xx


OMG!! They are like the cutest ghosts EVER!!!! *dies*
ReplyDelete