Ads 468x60px

Monday, July 29, 2013

piCture pOlish Blogfest 2013!

Yaaaay, It's that time of year again!

I am back for my second year of blogfest and this one is quite different than previous years.
I got given three shades, and we have to come up with nail art which incorporates all three polishes, as well as doing a tutorial. Now, i am no good at doing tutorials, so sorry in advance!


The three shades i got given were Atomic, Bombshell & Sea Jewel


I decided to go really simple and use striping tape for my mani.
This is the end result.


1) I started off with painting one nail, each a different colour. (You'll see my pinky in the picture is actually blue, but at the last minute i decided to change it to Atomic as it was just too much blue)
2 coats were needed for bombshell and Atomic, and 3 coats for Sea Jewel.


2) Wait for your mani to completely dry before starting on the next stage. I waited about 30 minutes but 10-15 minutes might be enough. I always like to make sure they are completely dry.

3) I cut about 14 pieces of striping tape, long enough to cover the nail and a bit more to pull it off from. I cut them all first and hung them off the side of my work bench until i was ready to use them. Always cut more than you need, it's cheap and it saves having to try and cut it later with wet nails.

4) Place striping tape in the position you desire. It can be a little tricky so have a little patience. Also using tweezers can help position it correctly too.


5) Once you have your tape in place, paint the whole nail with your chosen colour, I used 2 quick coats of bombshell over Atomic on the ring finger.


6) After the second coat, pull the tape off straight away so it doesn't dry into the polish and your design will have crisp lines.


7) Tar dar!! I used my clean up brush and a bit of acetone to clean up my cuticles. 
It's best to do one nail at a time as you don't want the tape to dry into the polish and pull the polish up with it when you take it off. 

8) Use your favourite fast dry top coat and your done! 


I won't bore you with showing each nail i did, as it's the same process for the rest, but here is the finished result. (read: i forgot to take photos of the rest and only realised when editing that this was all i had *has a sad*) 


For the thumb, middle and pinky fingers, i used the tape close together like i did in step 4, but in step 5 i painted in between the tape rather than the whole nail, just for something different. You can always use a striping brush and a steady hand to achieve the same look without tape.


I hope you enjoy my blogfest mani! Please check out everyone else that is participating. Links to some below in the inlinkz area. You can also check out Picture polish on the below social media sites where they will be showing everyones mani's.


I had fun with these polishes and i love all three! Two of which i never thought i'd buy but i'm glad i got.

Thank you Picture Polish for letting me be involved! 

Shades in the post were provided for review.

Have a great week everyone!! 

Kel xx

Thursday, July 25, 2013

Oranges!

Hi everyone!
So i haven't blogged in two weeks! haha No real reason why but i just didn't have the motivation to blog. I have still be doing my nails, not as much as usual, but if you follow my instagram you would have seen them, or most of them..
Anyway, i am back and i have a lot of pics just sitting in my "to be blogged" folder. Yes, alot of them are old and i don't just want to blog one after the other. I also can't bear to put them in the trash either. So i will be blogging in colours for a little while lol

Today's colour is Orange!

These are the mani's i have done recently that are orange.


Ulta3 Orange Blossom. Pale orange crelly. This was 3 coats. I absolutely hated this colour on me. It's a nice colour though.


Essence Doc. Vibrant orange creme. Two coats. Not as neon as it looks in the pics. Beautiful to apply.


Essence Prince Charming topper over Essence Doc. Blue hex with small silver glitter. One coat.


Essence Boho Chic. Peach creme with orange-y gold flakes. Two coats. Very unique colour but i don't like it against my skin tone.


Julie G Gumdrops in Tangerine Dream. My very first Liquid sands/textured polish. I got the whole collex. This was the first one i tried. I love it and i am craving more liquid sand/texture polishes. I haven't been fortunate enough to buy more yet but hopefully in a few weeks i can. =) This was two coats. I love love love this colour and it screams summer to me. It winter here at the moment which sucks, and you all know how much i hate winter lol. I will definitely be pulling this one out of the draw again when summer comes around.


Have a great day!

Kel xx

Wednesday, July 10, 2013

June Aussie Indie Box!

Yep, bit late to the party as usual lol!
Rachel from Glam Polish has put together a monthly polish box for Aussies! Yaaay! Finally we have something awesome that noone else has!

Most of you will have seen what's in and you can't get June's box anymore but here is what it contains.


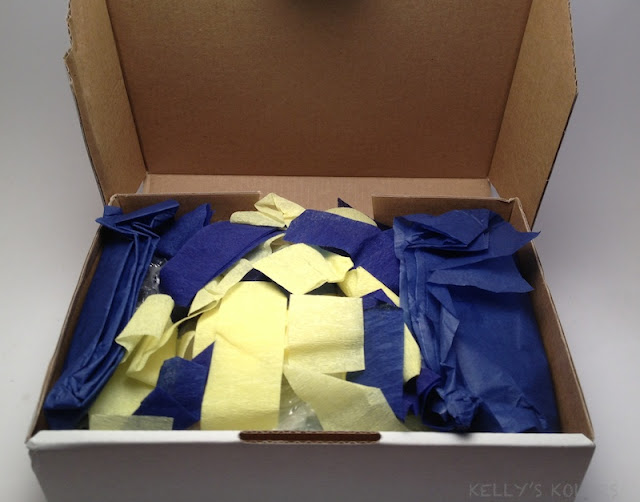
Cute little box it comes in.


All neatly bubble wrapped up and wrapped in tissue paper.


Contents:


Three of the polishes from this months box were limited Edition. Love Thy Polish How do you Spell FBI? can be purchased from her store. I'm not sure about Alanna Renee Lenny. 

Swatches to come soon!
I was so impressed with June's box i immediately ordered July's box, which should be arriving any day now. If you want to order, you'll have to wait until August's box is up for sale which should be in a week or two from Glam Polish's Store for $47.99 plus $7.95 postage.


Kel xx

Friday, July 5, 2013

Nailene Calcium Gel Tip Kit review.

Last week i reviewed two of the three products i received from Nailene. Today i will be reviewing the third. 

I received the Gel Kit, which was awesome as i have a break in my index finger and i didn't want to round it off, so it was a great time to try this out.


The Kit comes with;
- Instructions
- Nailene Gel Overlay
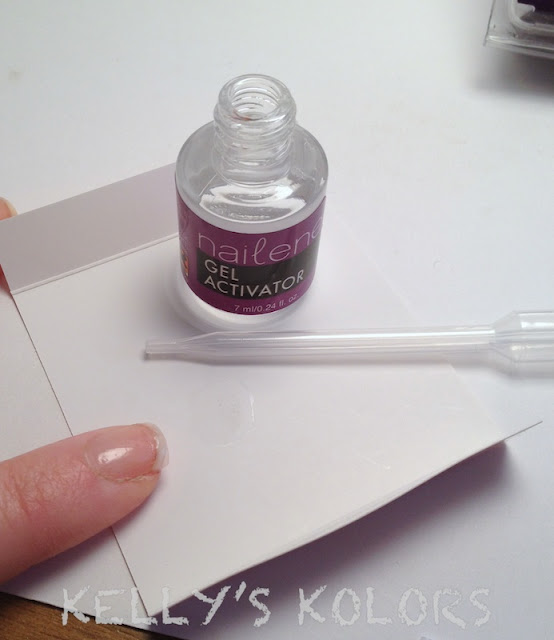
- Nailene Gel Activator
- Tips in both white and clear
- Plastic dropper (not pictured)
- Nail file and buffer pad


The break on my index finger which i will be putting the Gel overlay on today. 


I started with wiping my nail down with nail polish remover to get rid of any dirt and oils.


I then chose a tip that best suited my nail size. If your inbetween sizes, choose the bigger size and file the sides down. It also told me to keep the tip on the holder thing and twist it off once it was stuck on my nail but they're a bit flimsy and it just fell off anyway, which was fine as it seemed easier to work with.


I then used the Gel Overlay and placed a dab on my nail where i wanted to place the tip, quickly put the tip into place and waited a few seconds for it to adhere.


I then filed the tip down to my liking. I did file the sides down a bit too to fit better and so it didn't look so flared out. 

I used the Gel overlay again and painted my whole nail with it, just like i paint my nails. 


 Then using the plastic dropper that is included, i placed 2 drops of the Gel Activator on my nail, starting at the cuticle and letting it roll down my nail.

I waited 2-3 minutes and repeated a coat of Gel Overlay and 2 drops of the Activator. I was happy there and let it dry a little bit longer (around 5 mins).
I then gave it a light buff (the black file looking thing) and i put a coat of topcoat over the top.

And your done! =D


This was very simple to use and a lot easier than the acrylic set. It's as simple as painting your nails lol. 
The great thing with the gel kit is that it is odourless and won't stink the house out.
I did find that somehow, or for some reason, i got a very slight uncomfortable pressure feeling in my nail and it was a bit tender to touch. It was ok by the next day, but i noticed my nails were not as curved as you see in the pic above, and they were quite flat. 


You can see in the below picture (index finger) with what i mean. It almost looks like i have duck nails 0_o

(Polish is I Shit Glitter from Love Thy Polish

I took the gel off this morning and my nail has somewhat gotten it's curve back. Hopefully, over time it will come back fully to it's original curve.

While i really loved the idea of this product and was excited to use it, i cannot go past the pressure felt in my nail. I am going to give this another try soon and see if the outcome is better. I'm not sure if it was the way i applied it or something but it seemed strange. 

Nailene Gel kit was provided for honest review, see my disclosure policy for more info.


Kel xx